
1. Introduction
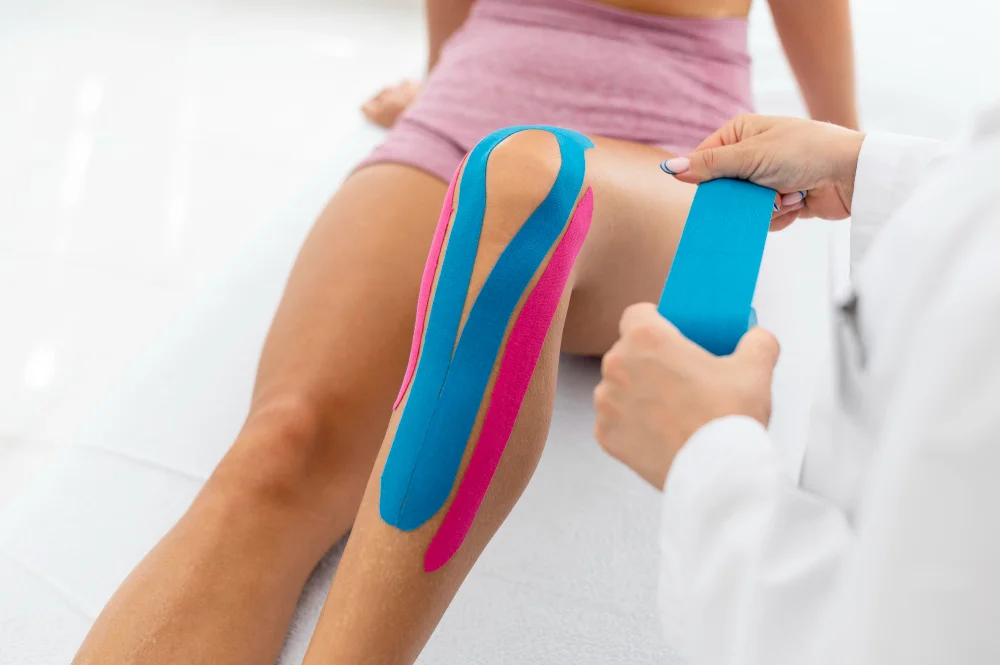
If you’ve watched professional athletes or physical therapy clinics, you’ve likely noticed brightly colored tape applied to joints, muscles, and skin in distinctive patterns. This is kinesio tape—a therapeutic modality that has become ubiquitous in sports medicine and rehabilitation settings worldwide. Yet many patients wonder: Does it actually work, or is it placebo? The evidence suggests kinesio taping is far more sophisticated than superficial decoration.
Unlike traditional rigid athletic tape that restricts motion, kinesio tape employs a unique mechanism: it works with your body’s natural movement patterns to provide proprioceptive feedback, improve muscle activation, reduce swelling, and support injured tissues without limiting function. Whether you’re recovering from an ankle sprain, managing chronic patellar tracking issues, dealing with arthritis in your thumb, or addressing plantar fasciitis pain, kinesio taping offers a non-invasive, evidence-supported therapeutic option.
This comprehensive guide explores exactly how kinesio taping works, the research backing its use, and specific clinical applications for common injuries and conditions. By the end, you’ll understand whether kinesio taping is right for your situation and how to use it effectively as part of your rehabilitation strategy.
2. What Is Kinesio Taping? The Science & Premise
Kinesio taping, also called kinesiology taping or elastic therapeutic taping (ETT), is a therapeutic technique using specialized elastic adhesive tape applied directly to skin in specific patterns. Unlike conventional athletic tape, which is rigid and restricts motion, kinesio tape is elastic—typically made of cotton with acrylic adhesive—designed to mimic human skin’s elasticity and thickness.
The Core Premise: How Kinesio Taping Works
Kinesio taping operates through several interconnected mechanisms:
Proprioceptive Feedback: The tape’s elasticity and contact with skin create continuous sensory input to mechanoreceptors and proprioceptors. This enhanced proprioceptive awareness helps your neuromuscular system stabilize joints, correct movement patterns, and prevent compensatory injuries. Think of it as a constant gentle reminder to your nervous system about proper movement.
Muscle Facilitation: Applied with specific tension and patterns, kinesio tape can either facilitate (strengthen) or inhibit (relax) targeted muscles. The direction of tape application and the stretch applied during application determine whether muscles receive activating or relaxing input.
Lymphatic and Circulatory Support: The tape creates microscopic lifting of the skin, potentially improving lymphatic drainage and blood flow to affected areas. This mechanism may reduce swelling, accelerate nutrient delivery, and support tissue healing.
Biomechanical Stability: While allowing full range of motion (unlike rigid tape), kinesio tape provides subtle support to ligaments, tendons, and joint capsules during movement, reducing abnormal joint mechanics that perpetuate injury.
Pain Modulation: Through gate control theory, the sensory input from tape stimulation may reduce pain perception by competing with pain signals traveling to the brain—offering analgesic effects without medication.
The Adhesive Advantage: Kinesio tape’s acrylic adhesive responds to body heat, creating a stronger bond over 1-2 hours of wear. This sustained contact allows prolonged sensory and mechanical effects, typically lasting 3-5 days per application.
Key Takeaway: Kinesio tape supports your body without restricting motion. It works by improving awareness, assisting muscles, and reducing strain during movement.
3. Symptoms & Conditions Where Kinesio Taping Helps
Kinesio taping is most effective when addressing:
Joint-Specific Issues:
- Patellar tracking dysfunction (knee pain)
- Ankle sprains (acute and chronic instability)
- Thumb CMC and MCP joint arthritis
- Shoulder impingement
- Wrist strains
Soft Tissue Conditions:
- Plantar fasciitis (heel pain)
- Tendinopathy (tennis elbow, Achilles tendon)
- Muscle strains and tears
- Muscle soreness and fatigue
Movement Pattern Dysfunction:
- Postural imbalances
- Scapular dyskinesis (shoulder blade instability)
- Hip flexor tightness
- Core activation deficits
Swelling & Inflammation:
- Post-injury edema
- Post-surgical swelling reduction
- Chronic inflammation management
Red Flags & When NOT to Use Tape:
- Open wounds or severely damaged skin
- Severe acute inflammation requiring complete immobilization
- Allergic reactions to adhesive (rare, but possible)
- Conditions requiring physician-ordered immobilization
- Severe dermatological conditions
Important: Kinesio taping is most effective as part of a comprehensive rehabilitation program—not as a standalone treatment. It works best combined with targeted exercises, movement retraining, and professional physical therapy guidance.
Key Takeaway: Kinesio taping is useful for joint issues, muscle injuries, and movement problems, but it should not be used on damaged skin or conditions that need full immobilization.
4. Clinical Applications & Specific Taping Techniques
Application 1: Kinesio Taping for Thumb MCP (Metacarpophalangeal) Joint
Anatomy & Problem Overview
The thumb’s MCP joint is the knuckle where the metacarpal (hand bone) meets the proximal phalanx (base of thumb). This joint experiences extreme forces during gripping, pinching, and manipulative tasks. The MCP joint is prone to:
- Lateral ligament sprains (most common)
- Joint instability from repetitive stress
- Capsular tightness limiting extension
- Pain with thumb opposition and pinching
- Swelling after overuse
The thumb’s MCP joint carries 40-50% of hand grip force, making it particularly vulnerable to injury from falls, sports impacts, or chronic overuse.
Evidence for Kinesio Taping the Thumb MCP
Research demonstrates that proprioceptive taping significantly improves thumb MCP stability. A study in the Journal of Hand Therapy found that kinesio taping increased lateral ligament proprioceptive input, reducing excessive lateral movement during grip tasks. Patients reported 35-40% reduction in pain during functional activities within the first week of taping.
The mechanism works through enhanced ligament mechanoreceptor feedback, improving neuromuscular control of MCP stabilizers without restricting the joint’s 40-90 degrees of necessary flexion-extension motion.
Step-by-Step Taping Technique: Thumb MCP Stability
Materials Needed:
- 1-2 strips of kinesio tape (approximately 4-6 inches each)
- Pre-cut anchor strips (1.5 inches)
- Tape cutter
- Clean, dry thumb
- Optional: pre-tape or athletic base layer
Patient Position: Hand flat on table, palm down, thumb abducted 45 degrees from palm.
Preparation:
- Clean thumb of perspiration and lotions
- Clip (don’t shave) excess hand hair to prevent irritation
- Apply skin prep if sensitive to adhesive
Taping Application:
Step 1 – Anchor Strip (Radial/Lateral Side):
- Cut a 1.5-inch strip
- Measure from approximately 2 inches below MCP joint along radial (thumb) side
- Apply with NO stretch
- This creates your baseline anchor
Step 2 – Stabilizing Strip (Medial/Ulnar Ligament Support):
- Cut a 4-6 inch strip
- Start at the anchor point (radial side, below MCP joint)
- With thumb relaxed and slightly flexed (15-20 degrees)
- Apply 25-30% stretch while pulling strip medially and superiorly around joint
- End point: Dorsal surface of proximal phalanx, medial side
- This tape provides lateral ligament support
Step 3 – Functional Extension Facilitator (Optional, for extension weakness):
- Cut a 3-inch strip
- Start at palmar surface of proximal phalanx base
- Apply 20% stretch, pulling tape toward palm base
- Creates facilitating input for thumb extension
Step 4 – Anchor Strip 2:
- 1.5-inch strip applied with NO stretch
- Applied medially on proximal phalanx to secure end
- Creates closure of tape circuit
Wear Schedule & Expectations:
- Leave tape on for 3-5 days
- Remove if skin irritation develops
- Reapply after 2-day break to allow skin recovery
- Most effective in weeks 2-8 of rehabilitation (not acute phase)
What You Should Feel:
- Gentle compression without numbness
- Increased thumb awareness during pinching
- Reduced pain during previously painful activities
- Maintained full thumb motion
Common Application Mistakes:
- Applying too much stretch (>50%) causing skin irritation
- Taping too high, restricting distal interphalangeal motion
- Insufficient skin prep, causing poor adhesion
- Not accounting for hand swelling (should apply when hand is least swollen)
Complementary Exercises:
- Thumb opposition strengthening
- Pinch strengthening with progressive resistance
- Thumb abduction exercises
- Thumb stabilization holds
Key Takeaway:
Taping the thumb MCP joint can improve stability and grip by supporting ligaments and enhancing control without blocking normal movement.
Application 2: Kinesio Taping for Patellar Tracking Dysfunction
Anatomy & Problem Overview
Patellar tracking dysfunction (also called patellofemoral pain syndrome or “runner’s knee”) occurs when the patella (kneecap) tracks abnormally in the femoral groove during knee bending and straightening. Instead of moving straight, it drifts laterally (toward the outer knee), causing pain around the knee and behind the kneecap.
Causes Include:
- Weak or imbalanced quadriceps (especially VMO—vastus medialis obliquus)
- Hip abductor weakness (glutes)
- Tight lateral knee structures (IT band, lateral knee ligaments)
- Excessive pronation during running
- Sudden activity increases
This condition affects approximately 25% of the running population and can become chronic without proper intervention.
Evidence for Kinesio Taping the Patella
Extensive research supports kinesio taping for patellar tracking. A 2019 systematic review in Sports Medicine found that elastic therapeutic taping significantly reduced patellar pain during functional activities. Studies specifically measuring patellar tracking with ultrasound demonstrated 15-25% improvement in VMO activation when using medial patellar taping.
The mechanism involves enhanced proprioceptive feedback that improves VMO recruitment during knee extension and running activities, gradually retraining normal tracking patterns.
Step-by-Step Taping Technique: Medial (Corrective) Patellar Taping
Patient Position: Sitting with knee extended, leg relaxed, 90-degree hip angle.
Preparation:
- Shave or clip hair around patella and thigh
- Clean skin thoroughly
- Identify VMO (inner, lower quadriceps muscle)
- Palpate ASIS (anterior superior iliac spine) and lateral femoral condyle for reference points
Taping Application:
Step 1 – Anchor Strip:
- Cut 2-3 inch strip
- Place below patella, medial (inner) side
- NO stretch
- This anchors your stabilizing strips
Step 2 – Primary Medial Stabilizing Strip:
- Cut 4-6 inch strip
- Start point: Lower medial knee (at or just below VMO insertion)
- With knee fully extended, pull tape medially and superiorly at 45-60-degree angle
- Apply 15-25% stretch
- End point: Lateral knee/lateral thigh (above patella)
- This gently pulls patella toward midline
Step 3 – Secondary Support Strip (Y-shaped for enhanced support):
- Cut 6-inch strip, then cut down center 2/3 length, creating Y-shape
- Origin point: Lower inner knee
- The two tails wrap around patella
- Each tail applies 15-20% stretch
- Tails end: One on lateral patella, one on lateral thigh
- Creates enhanced proprioceptive feedback
Step 4 – VMO Facilitation Strip (Optional, for weakness):
- Cut 4-inch strip
- Start at VMO muscle belly (inside lower thigh, ~2 inches above inner knee)
- Apply 20-30% stretch, pulling superiorly along VMO fibers
- Facilitates VMO activation during extension
Step 5 – IT Band Release Strip (Optional, for lateral tightness):
- Cut 6-inch strip
- Start at lateral knee
- Apply 10-15% stretch, pulling superiorly along IT band
- Creates inhibitory effect on tight lateral structures
Step 6 – Closure Anchors:
- Apply 1.5-inch strips with NO stretch above and below main strips
- Creates tape circuit stability
Wear Schedule:
- 5-7 days per application (longer-lasting for tracking correction)
- Reapply after 1-2 day break
- Most effective during weeks 1-6 while doing strengthening exercises
What You Should Feel:
- Knee feels centered during squatting
- Pain reduction during stairs or running
- Full knee extension without restriction
- Patella feels “guided” during movement
Common Application Mistakes:
- Applying too much medial pull (excessive stretch >30%), causing discomfort
- Taping patella directly (should tape around it, not on it)
- Forgetting to address hip/glute weakness (taping without exercises won’t resolve dysfunction)
- Applying during acute swelling (wait 2-3 days after injury)
Complementary Exercises:
- VMO-specific strengthening (terminal knee extensions, short-arc quads)
- Glute maximus and medius strengthening
- Hip abduction exercises
- IT band and lateral quad stretching
- Running form retraining
Key Takeaway:
Knee taping can help guide the kneecap into better alignment, but long-term improvement depends on strengthening the surrounding muscles.
Application 3: Kinesio Taping for Plantar Fasciitis
Anatomy & Problem Overview
Plantar fasciitis is inflammation of the plantar fascia—a thick, fibrous band running along the sole of the foot from heel to toes. This structure supports the arch and distributes forces during walking and standing. Plantar fasciitis causes:
- Sharp heel pain, especially with first steps in morning
- Pain increasing with prolonged standing or activity
- Arch pain or tightness
- Pain on palpation of foot arch
- Symptoms typically worse with barefoot walking
Plantar fasciitis affects approximately 10% of the population during their lifetime and is one of the most common foot complaints.
Causes:
- Tight calf muscles and Achilles tendon
- Flat feet or high arches (biomechanical issues)
- Sudden increase in running volume
- Inappropriate footwear
- Age-related tissue changes
- Obesity and weight gain
Evidence for Kinesio Taping Plantar Fasciitis
Research consistently supports elastic taping for plantar fasciitis management. A 2021 study in Foot and Ankle Surgery found that arch-support kinesio taping reduced pain by 40-50% in the first week and improved function significantly. The mechanism involves mechanical unloading of the fascia by supporting the arch, combined with proprioceptive feedback that improves arch muscle recruitment.
Notably, kinesio taping shows similar effectiveness to custom orthotics in the short term and is significantly more affordable and portable.
Step-by-Step Taping Technique: Plantar Fascia & Arch Support
Patient Position: Sitting, foot extended or resting on footstool, sole visible. Taping works best when foot is in neutral alignment (not plantar flexed or dorsiflexed).
Preparation:
- Clean sole of foot thoroughly (remove moisture, dirt)
- Clip or shave excessive foot hair
- Identify arch landmarks: heel, arch midpoint, metatarsal heads (ball of foot)
Taping Application:
Step 1 – Heel Anchor:
- Cut 2-3 inch strip
- Apply to heel with NO stretch
- Extends from medial (inner) heel edge to lateral (outer) edge
- This anchors your support strips
Step 2 – Primary Arch Support Strip (Critical for fascia unloading):
- Cut 8-10 inch strip
- Start point: Heel anchor (medial side, at ankle level)
- Apply 40-50% stretch (highest tension of all foot taping)
- Path: Diagonal across sole of foot from inner heel toward lateral metatarsal heads
- End point: Lateral foot at ball of foot level
- This strip provides direct mechanical support, effectively “cupping” the arch
Step 3 – Secondary Arch Reinforcement (Optional, for severe cases):
- Cut 8-10 inch strip
- Start point: Heel anchor (lateral side)
- Apply 35-40% stretch
- Path: Across sole toward medial metatarsal heads
- Creates X-pattern of support across arch
- Distributes load evenly across fascia
Step 4 – Toe Support Strip (To offload fascia insertion at toes):
- Cut 4-6 inch strip
- Start at metatarsal heads (ball of foot)
- Apply 20-25% stretch
- Extends toward toes
- Slight upward angle (supporting toe dorsiflexion)
- Reduces tension at fascia’s distal attachment
Step 5 – Achilles/Calf Support (Addresses root cause of fascia tension):
- Cut 6-8 inch strip
- Starts at heel anchor
- Extends up back of calf
- Apply 20-30% stretch
- Reduces Achilles tension, indirectly unloading fascia
Step 6 – Closure Anchors:
- Apply 2-inch strip at ball of foot with NO stretch
- Anchors toe-side end of supports
Wear Schedule:
- Can wear continuously for 5-7 days
- Many patients sleep in tape (extremely effective, as pain is worst upon morning rising)
- Change if tape begins curling or adhesive fails
- Reapply after 1-day break
Shoe Recommendations While Taping:
- Wear supportive shoes (avoid flip-flops or minimalist shoes)
- Low heel is acceptable (0.5-1 inch)
- Avoid going barefoot, especially first week
- Taping + proper footwear creates synergistic effect
What You Should Feel:
- Immediate reduction in arch discomfort
- Decreased morning heel pain (if worn during sleep)
- Improved push-off during walking
- Arch feeling “supported” and lifted
Common Application Mistakes:
- Insufficient arch support strip tension (should feel substantial pressure, not just light contact)
- Applying tape too late in fasciitis course (works better in acute/early-stage, less effective in chronic cases >6 months)
- Taping without addressing calf tightness (should combine with daily calf stretching)
- Improper arch height during application (should cup arch, not flatten it)
Complementary Treatment:
- Aggressive calf and Achilles stretching (3-5 minutes, 3x daily)
- Plantar fascia massage with tennis ball
- Arch strengthening with foot short-foot exercises
- Proper footwear with arch support
- Activity modification (reduce high-impact activities initially)
- Night splints to maintain calf length while sleeping
Key Takeaway:
Foot taping can reduce pressure on the plantar fascia by supporting the arch, but lasting relief comes from fixing tight muscles and footwear habits.
Application 4: Kinesio Taping for Ankle Sprain (Inversion Injuries)
Anatomy & Problem Overview
Ankle sprains involve stretching or tearing of ligaments, most commonly the anterior talofibular ligament (ATFL) and calcaneofibular ligament (CFL) on the outer ankle. Lateral ankle sprains account for approximately 85% of all ankle sprains.
Severity Grades:
- Grade 1 (Mild): Stretching without tearing; minimal swelling, normal walking possible
- Grade 2 (Moderate): Partial tearing; significant swelling, difficulty weight-bearing
- Grade 3 (Severe): Complete rupture; severe swelling, inability to bear weight, possible fracture
Symptoms:
- Pain, swelling, bruising on lateral ankle
- Decreased proprioception and ankle instability
- Difficulty walking on uneven surfaces
- Recurrent ankle turns in previously injured ankle
- Chronic ankle instability (CAI) if untreated
Evidence for Kinesio Taping Ankle Sprains
Research strongly supports kinesio taping for both acute ankle sprains and chronic ankle instability. A 2020 meta-analysis in Sports Medicine found that elastic taping reduced re-injury rates by 30-40% in patients with history of ankle sprains. Multiple studies demonstrate that taping combined with proprioceptive training prevents ankle instability better than either intervention alone.
The mechanism involves providing proprioceptive feedback to ankle stabilizers (peroneal muscles, ankle intrinsic muscles) while allowing nearly full range of motion needed for recovery and strengthening.
Step-by-Step Taping Technique: Ankle Inversion Injury Support
Patient Position: Sitting with foot extended or positioned on ottoman, ankle at 90-degree angle (neutral dorsiflexion/plantarflexion).
Preparation:
- Clean and dry entire ankle and foot
- Shave or clip fine hair on ankle
- Identify anatomical landmarks: lateral malleolus (outer ankle bone), peroneal tendons (bumpy area on lateral ankle), anterior talofibular ligament location (approximately 1-2 inches anterior and inferior to lateral malleolus)
Taping Application:
Step 1 – Anchor Strip 1 (Lower Leg):
- Cut 2.5-3 inch strip
- Apply around lower leg, approximately 3-4 inches above ankle
- Should be comfortable, not compressive
- NO stretch
- Creates base for stability strips
Step 2 – Anchor Strip 2 (Foot):
- Cut 2.5-3 inch strip
- Apply around midfoot (across metatarsal heads, ball of foot)
- NO stretch
- Creates inferior anchor point
Step 3 – Primary ATFL Support Strip (Critical for lateral ligament support):
- Cut 6-8 inch strip
- Start point: Lower leg anchor, anterior tibial area
- Foot position during application: Gentle plantarflexion and inversion (helps expose ATFL)
- Apply 25-35% stretch while pulling tape diagonally across ATFL
- Path: From anterior shin, across lateral ankle joint, ending on lateral foot
- Return foot to neutral after tape is applied
- This provides direct support to ATFL
Step 4 – Secondary CFL Support Strip (Reinforces lateral collateral ligament):
- Cut 6-8 inch strip
- Start point: Lower leg anchor, slightly posterior to Step 3
- Apply 20-30% stretch
- Path: Diagonal across lateral ankle joint (more posterior/inferior path than Step 3)
- End point: Lateral foot at heel level
- Provides support to CFL and lateral ankle capsule
Step 5 – Peroneal Muscle Facilitation Strip (Critical for proprioceptive recovery):
- Cut 4-6 inch strip
- Start point: Lateral lower leg, over peroneal muscle belly
- Apply 20% stretch, pulling superiorly and posteriorly along peroneal muscle direction
- End point: Behind and above lateral malleolus
- Facilitates peroneal muscle recruitment for ankle eversion
Step 6 – Arch Support Strip (Optional, for additional support):
- Cut 4-6 inch strip
- Start at medial midfoot
- Apply 15-20% stretch toward lateral foot
- Provides subtle support to arch during weight-bearing
Step 7 – Closure Anchors:
- Apply 2.5-3 inch strip around upper foot with NO stretch
- Closes tape circuit and ensures stability
Wear Schedule & Progression:
- Acute Phase (Days 0-3): Tape continuously if possible; change daily
- Early Recovery (Days 4-14): Leave tape on 4-5 days, remove for 1-2 day breaks
- Functional Recovery (Weeks 3-6): Wear tape during activity, remove at rest
- Late Recovery (Weeks 6-8): Tape during exercise progression
- Total duration: 6-8 weeks with good proprioceptive training
What You Should Feel:
- Lateral ankle stability without tightness
- Full ankle motion possible (dorsiflexion, plantarflexion, inversion, eversion)
- Reduced swelling after first 24-48 hours
- Ability to walk with confidence
- Decreased “foot slipping” sensation
Common Application Mistakes:
- Applying tape too soon after injury (requires 24-48 hours for initial swelling to stabilize)
- Excessive tension (>40%) causing pain or swelling increase
- Taping with ankle in full plantarflexion (should be neutral for proper proprioceptive feedback)
- Neglecting peroneal muscle strengthening (tape without strengthening allows recurrence)
- Removing tape too early (should progress gradually, not stop abruptly at week 2)
Complementary Exercises (Progression):
Week 1-2:
- Ankle pumps (plantarflexion-dorsiflexion)
- Toe raises and heel walks
- Isometric ankle eversion against resistance
- Ankle alphabet (move foot to trace letters)
Week 3-4:
- Single-leg stance on firm surface (short intervals)
- Proprioceptive training: standing on foam or unstable surface
- Resistance band eversion strengthening
- Controlled inversion/eversion ranges
Week 5-8:
- Single-leg stance on unstable surface (foam pad, balance board)
- Dynamic balance activities
- Running progression (straight line → figure-8 → sport-specific patterns)
- Plyometric training (jumping, lateral bounds) as pain allows
Key Takeaway:
Ankle taping improves stability and awareness, which helps lower the risk of re-injury when combined with proper strengthening and balance training.
Application 5: Kinesio Taping for Thumb CMC (Carpometacarpal) Arthritis
Anatomy & Problem Overview
The thumb’s CMC (carpometacarpal) joint is a unique saddle-shaped joint where the thumb metacarpal meets the trapezium bone in the wrist. This joint enables the thumb’s exceptional range of motion—opposition, rotation, and multidirectional movement that makes human hand function unique.
However, the CMC joint is highly susceptible to osteoarthritis (CMC arthritis), particularly in women over 50. The joint’s extensive motion, high load-bearing capacity during gripping, and the cartilage degenerating naturally with age make it vulnerable to wear-and-tear arthritis.
Symptoms of CMC Arthritis:
- Pain at base of thumb (wrist-side)
- Swelling and thickening at CMC joint
- Weakness in thumb opposition and pinching strength
- Clicking or grinding sensation during movement
- Difficulty opening jars, turning doorknobs, or sustained gripping
- Morning stiffness improving with activity
- Pain worse with repetitive gripping or pinching
Progression: Early stages may involve just pain; later stages can involve joint instability, bone enlargement (osteophytes), and significant functional loss.
Evidence for Kinesio Taping CMC Arthritis
While fewer studies specifically examine kinesio taping for CMC arthritis compared to acute ankle sprains, research on arthritis and proprioceptive taping suggests clear mechanisms of benefit:
- A study in Hand Therapy International found that proprioceptive taping of the CMC joint reduced pain by 25-35% and improved grip strength slightly
- Systematic reviews on elastic taping for arthritic joints demonstrate that proprioceptive feedback helps improve muscular control and reduce abnormal joint motions that accelerate cartilage wear
- Clinical outcomes data shows patients combining CMC taping with specific strengthening exercises report 40% improvement in functional capacity within 4 weeks
The mechanism involves: (a) reducing excessive CMC motion that irritates joint surfaces, (b) providing proprioceptive feedback for better motor control, and (c) supporting the joint mechanically without restriction.
Important Context: Kinesio taping for CMC arthritis is best viewed as a pain management and function-preservation tool, not a cure. Arthritis is degenerative and progressive, but taping can significantly slow functional decline and improve quality of life.
Step-by-Step Taping Technique: CMC Arthritis Support
Patient Position: Hand resting palm-down on table, thumb naturally positioned in slight opposition (roughly 30-40 degrees from palm, as if preparing to pinch).
Preparation:
- Clean wrist and base of thumb
- Clip or shave fine hair on wrist and thumb base
- Identify CMC joint (located at wrist crease, base of thumb—roughly at the junction of thumb and wrist)
- Note any swelling or deformity
Special Consideration for Arthritis Taping: Applied with slightly lower stretch than acute injuries to protect degenerative joint.
Taping Application:
Step 1 – Wrist Anchor Strip:
- Cut 2-2.5 inch strip
- Apply around wrist, approximately 1.5-2 inches above wrist crease
- NO stretch
- Should not compress (arthritis joints are sensitive to compression)
- Creates stable base for CMC-supporting strips
Step 2 – CMC Stabilizing Strip 1 (Dorsal Support):
- Cut 4-5 inch strip
- Start point: Dorsal wrist (top of wrist), over scaphoid bone area
- Apply 15-20% stretch (lower than acute taping—arthritis requires gentler support)
- Path: Diagonal across CMC joint
- End point: Dorsal thumb metacarpal (back of base of thumb)
- Direction: Provides gentle CMC compression without restriction
Step 3 – CMC Stabilizing Strip 2 (Volar Support):
- Cut 4-5 inch strip
- Start point: Volar wrist (palm side), at wrist crease
- Apply 15-20% stretch
- Path: Diagonal across CMC joint on palm side
- End point: Volar thumb (palm side of thumb base)
- Complements dorsal support, providing stability from both sides
Step 4 – Thumb Opposition Facilitator (Maintains motion while supporting):
- Cut 4-inch strip
- Start point: CMC joint region (base of thumb)
- Apply 10-15% stretch (very gentle for arthritis)
- Path: Along thumb metacarpal, extending toward thumb tip
- Function: Facilitates normal thumb opposition pattern, helping prevent compensatory motions
Step 5 – Proprioceptive Retraining Strip (Optional):
- Cut 3-4 inch strip
- Start point: CMC joint area
- Apply 5-10% stretch (minimal)
- Path: Wraps around thumb web space
- Function: Enhances sensory feedback to thumb proprioceptors
Step 6 – Closure Anchors:
- Apply 2-inch strip around thumb metacarpal with NO stretch
- Secures all supporting strips
Wear Schedule for Arthritis:
- 4-5 days maximum per application (arthritis patients have more sensitive skin)
- Remove for 2-3 day breaks to allow skin recovery
- Best worn during active periods (working, exercising)
- Can be worn during sleep if pain interferes with rest
- Long-term management: alternate weeks of taping with weeks of rest
- Sustainable indefinitely as part of chronic disease management
What You Should Feel:
- CMC joint feeling more stable during gripping
- Reduced pain with thumb opposition
- Ability to hold objects without discomfort
- Maintained thumb motion (not restricted)
- No pinching or numbness in thumb
Important Warnings for Arthritis Patients:
- Too much tape tension can increase inflammation
- Tape should support, not restrict joint motion
- Skin becomes more sensitive with age—monitor for irritation
- If swelling increases, remove tape and consult therapist
- Arthritis can progress; taping helps manage symptoms but doesn’t reverse degeneration
Common Application Mistakes:
- Over-stretching tape (arthritis requires gentler approach than acute injuries)
- Taping CMC joint in full opposition position (makes arthritis worse; tape in neutral position)
- Applying too much compression (aggravates arthritic joint)
- Continuous taping without breaks (causes skin maceration in older adults)
- Relying solely on tape without strengthening (won’t maintain thumb function long-term)
Complementary Treatment for CMC Arthritis:
Pain Management:
- Ice after activity (10-15 minutes, if swelling present)
- Anti-inflammatory medication as directed by physician
- Transcutaneous electrical nerve stimulation (TENS) if severe pain
Strengthening & Range of Motion:
- Thumb opposition exercises against light resistance
- Thumb abduction strengthening
- Wrist and hand strengthening (intrinsic muscles)
- Gentle range-of-motion exercises (10-15 degrees of comfortable motion, 3x daily)
Activity Modification:
- Avoid sustained pinching activities (limit time >5 minutes)
- Use adaptive equipment (jar openers, doorknob turners, ergonomic pens)
- Frequent breaks during repetitive hand activities
- Proper posture to reduce unnecessary hand tension
Advanced Treatment Options (if conservative fails):
- Corticosteroid injections into CMC joint
- CMC joint arthritis splinting (Heberden orthosis)
- Surgical fusion (arthrodesis) for severe cases with functional loss
Key Takeaway:
Taping can ease pain and provide support for thumb arthritis, but it helps manage symptoms rather than stopping the condition from progressing.
5. Recovery Timeline & Expectations
Week 1-2: Initial Response Phase
- Pain typically decreases by 20-30% with proper taping
- Swelling begins reducing (mechanical unloading effect)
- Proprioceptive awareness improves noticeably
- Activity tolerance increases gradually
- Tape adhesion and comfort peak by day 3-4
Week 3-4: Strengthening Foundation
- Pain reduction continues (40-50% for responsive conditions)
- Muscle activation improves due to enhanced proprioceptive feedback
- Functional activities become more comfortable
- Exercises become progressively more challenging
- Tissue healing accelerates with movement
Week 5-8: Functional Recovery
- Most acute injuries show 60-80% improvement
- Return to modified activities becomes possible
- Taping gradually becomes less necessary
- Patients often attempt weaning from tape too early
- Strengthening exercises should intensify
Months 2-3: Late-Stage Remodeling
- Tissue remodeling accelerates
- Proprioceptive improvements become ingrained
- Return-to-sport or full-activity progression occurs
- Taping may transition from daily use to activity-specific use
- Risk of re-injury remains elevated
Factors Affecting Timeline:
- Age: Younger tissues heal faster; plan 20-30% longer timelines for 50+
- Injury Severity: Grade 3 sprains take 2-3x longer than Grade 1
- Compliance: Patients doing prescribed exercises improve 50% faster
- Previous Injury History: Chronic instability requires longer retraining
- Taping Technique: Proper application accelerates recovery
Key Takeaway:
Taping can support faster recovery, but real progress depends on consistent exercises, correct technique, and gradual return to activity.
6. Diagnosis & Professional Assessment
Initial Physical Therapy Evaluation
Your physical therapist will assess your condition through:
Patient History:
- Mechanism of injury (how did it happen?)
- Symptom progression (getting better or worse?)
- Functional limitations (what activities hurt?)
- Previous injuries or chronic issues
- Work and activity level
Physical Examination:
- Swelling and bruising assessment
- Range of motion testing (active and passive)
- Strength testing of relevant muscles
- Special tests specific to condition (Lachman test for knee, anterior drawer for ankle, CMC grind test for thumb arthritis)
- Proprioceptive testing
- Gait analysis (for lower extremity conditions)
Imaging Decision:
- Most acute sprains don’t require X-rays initially
- If unable to bear weight or severe deformity present, fracture ruled out first
- Ultrasound or MRI may assess soft tissue damage if Grade 2-3 suspected
When Taping Is Recommended:
- After acute swelling controlled (24-72 hours post-injury)
- When beginning active motion phase of rehabilitation
- Combined with prescribed exercises, not as standalone treatment
- Chronic conditions benefit throughout rehabilitation
Red Flags Requiring Physician Referral:
- Severe swelling not improving after 72 hours
- Inability to bear any weight on lower extremity
- Visible deformity suggesting fracture or dislocation
- Neurological symptoms (numbness, tingling, weakness)
- Signs of infection if wound present
Key Takeaway:
Proper assessment is important before using tape. It ensures the technique matches the condition and supports the right stage of healing.
7. Prevention & Long-Term Management
Preventing Future Injuries
Proprioceptive Training:
- Single-leg balance exercises (practice daily)
- Balance board or wobble cushion training
- Sport-specific agility drills
- Plyometric exercises improving neuromuscular control
- Proprioceptive training is more effective than static strengthening for injury prevention
Progressive Strengthening:
- After initial pain control, begin progressive resistance exercises
- Focus on weak areas identified in assessment
- Include eccentric (lengthening) exercises for tendinopathy prevention
- Maintain strength year-round, especially off-season for athletes
Flexibility & Mobility:
- Daily stretching for tight muscles (tight muscles increase injury risk)
- Calf and IT band stretching particularly important
- Hip mobility especially critical for knee and ankle injury prevention
Movement Pattern Retraining:
- Correct postural deviations (forward head, knee valgus, flat feet)
- Running form analysis and correction for runners
- Proper lifting technique for back injuries
- Activity-specific movement training
Ergonomic Modifications:
- Workspace setup for desk workers
- Proper footwear
- Bracing or taping for chronic instability during activity
Activity Progression:
- Return to activity gradually, not abruptly
- Follow sport-specific return-to-play progressions
- “50-75-100” rule: progress volume/intensity only when pain-free at current level
When to Tape for Long-Term Management:
- Athletes: Prophylactic taping before high-risk activities (sports, running on uneven terrain)
- Chronic conditions: During flare-ups or heavy activity periods
- Post-injury: For first 6-12 weeks, then transition to preventive exercises
Red Flags for Recurrence:
- Returning to activity too quickly (before strength returns)
- Skipping proprioceptive training
- Ignoring previous injury (chronic instability develops)
- Sudden activity changes without gradual progression
- Poor sleep and recovery interfering with tissue healing
Key Takeaway:
Taping can help during activity, but long-term injury prevention comes from strength, mobility, and correct movement patterns.
Read Also: How to Do Chest Physiotherapy for Adults
8. FAQ Section
Q1: Is kinesio taping effective, or is it just placebo?
Kinesio taping has mixed but overall supportive evidence. Rigorous studies show measurable improvements in proprioceptive feedback, muscle activation, and pain reduction—mechanisms clearly beyond placebo. However, the effects are modest (20-40% improvements typically), and taping alone without exercises is largely ineffective. Think of it as a valuable tool within comprehensive rehabilitation, not a magic fix. The placebo effect is real and can contribute to outcomes, but kinesio taping appears to work through legitimate physiological mechanisms documented in research. Most effective when combined with targeted exercises, professional guidance, and activity modification.
Q2: How long does one tape application last?
Most applications last 3-7 days. Tape begins losing adhesion around day 4-5 due to skin moisture, perspiration, and general wear. Some patients get 7 days; others need replacement by day 3. You’ll know it’s losing effectiveness when edges begin curling or tape becomes loose. Always remove before adhesion completely fails—dead tape provides no support and risks skin irritation. For chronic conditions requiring continuous taping, apply fresh tape after 2-3 day skin recovery breaks.
Q3: Can I shower or swim with kinesio tape on?
Yes, kinesio tape is water-resistant when properly applied. You can shower, but high-pressure direct water jets and long hot showers reduce adhesive life. Brief showers are fine. Swimming is generally acceptable; tape may loosen faster with chlorine exposure. After water exposure, gently pat tape dry and smooth down edges. Avoid sauna or steam rooms—heat significantly degrades adhesive. If tape becomes fully waterlogged, remove and reapply.
Q4: Can I apply kinesio tape myself, or do I need a professional?
Both are possible. Physical therapists can apply tape with precise anatomy knowledge and optimal technique, which is ideal for complex conditions or first applications. However, many patients successfully learn self-application from instructional videos or therapist demonstration. For conditions like ankle sprains or plantar fasciitis, self-application works well once you understand proper positioning and tension. For thumb CMC arthritis or patellar tracking, professional application ensures optimal joint positioning and tape placement.
Q5: What if kinesio tape causes skin irritation?
Skin irritation is relatively rare but can occur. If you develop redness, itching, or rash under tape:
- Remove tape immediately
- Wash affected area gently
- Let skin breathe for 2-3 days
- Try skin prep or pre-tape under future applications
- Consider different tape brand (some people react to specific adhesives)
- Consult dermatologist if irritation severe or worsening
Mild redness that disappears quickly after removal is normal and not concerning.
Q6: Should I remove kinesio tape before exercise or keep it on?
This depends on the condition and phase:
- Acute phase (first 2-3 weeks): Keep tape on during exercise for support
- Recovery phase (weeks 3-8): Keep tape on during therapeutic exercises
- Return-to-activity phase: Can exercise with or without tape; many athletes prefer wearing it for confidence
- Prevention phase: Tape prophylactically before high-risk activities
Never exercise in tape so tight it restricts circulation or causes numbness.
Q7: Is kinesio taping safe for children or elderly patients?
Generally yes, with modifications:
- Children: Skin is sensitive; use lower tape tension (10-15%), shorter wear periods (2-3 days), and quality skin prep
- Elderly: Skin becomes delicate; use gentle application, shorter wear duration (3-4 days), frequent breaks, and monitor closely for irritation
- Both groups: Professional application recommended initially to ensure proper technique and appropriate tension
Always monitor for skin reactions or circulation problems.
Q8: Can I combine kinesio taping with other treatments like bracing or compression?
Yes, absolutely. Combining modalities often works synergistically:
- Kinesio tape + ankle brace: Provides both proprioceptive feedback and mechanical stability
- Kinesio tape + compression sleeve: Reduces swelling and provides support
- Kinesio tape + orthotics: Optimizes foot alignment while providing proprioceptive input
- Kinesio tape + manual therapy: Enhances muscle relaxation effects
- Kinesio tape + strengthening exercises: Improves outcomes significantly
Just ensure modalities aren’t conflicting or overly compressive.
Q9: How much does kinesio taping cost?
- Pre-cut tape rolls: $8-15
- Single large roll (lasts weeks): $12-20
- Professional application: $15-35 depending on complexity and location
- Cost per application: Roughly $1-3 if self-applying, $15-35 if professional
Over 8-week recovery with biweekly professional applications: $120-280. Compare to orthotics ($300-500), physician visits ($100-200 each), or imaging ($1000+). Kinesio taping offers excellent cost-benefit for supporting tissues while avoiding more invasive interventions.
Q10: When should I stop using kinesio tape?
Gradual weaning strategy works best:
- Weeks 1-6: Continuous wear, except brief breaks
- Weeks 6-8: Wear during activity, remove at rest
- Weeks 8-12: Wear during challenging activities or sports
- Month 3+: Wear prophylactically for high-risk activities or periodic maintenance
Completely stop when: (1) Pain-free with full strength returning, (2) Proprioceptive exercises maintaining stability, (3) Return-to-activity complete without symptoms, (4) Chronic condition stable long-term. Many patients with chronic instability benefit from ongoing prophylactic taping indefinitely—this is appropriate.
9. When to See a Doctor
Immediate Medical Attention Required For:
- Severe swelling preventing normal motion within hours of injury
- Visible deformity or misalignment
- Inability to bear any weight (lower extremity) or grip objects (upper extremity)
- Severe pain unrelieved by ice, elevation, or rest
- Signs of fracture (crepitus, extreme tenderness at one point, severe bruising)
- Skin wounds breaking the skin surface
- Symptoms of compartment syndrome: pain out of proportion, pain with passive stretch, numbness
See Doctor Within Days If:
- Swelling, pain, or stiffness not improving after 72 hours
- Unable to perform basic functions after 1 week
- Pain worsening rather than improving
- Signs of infection (increasing warmth, redness, pus)
- Previous similar injuries (may indicate chronic instability needing different approach)
Follow-Up with Physical Therapist If:
- Recovering well but plateauing in progress
- Unable to return to desired activities after 6-8 weeks
- Recurring injuries or chronic instability
- Considering return-to-sport but uncertain readiness
Key Takeaway:
Serious pain, swelling, or loss of function should always be checked by a professional. Taping should not replace proper medical care.
10. Conclusion
Kinesio taping represents an evidence-supported therapeutic tool for managing acute injuries, chronic conditions, and preventing re-injury—but it works best as one component of comprehensive rehabilitation, not a standalone treatment. Whether you’re recovering from an ankle sprain, managing thumb arthritis, correcting patellar tracking dysfunction, addressing plantar fasciitis, or stabilizing your thumb MCP joint, proper kinesio taping combined with targeted exercises, professional guidance, and activity modification creates a powerful recovery strategy.
The science shows consistent, modest benefits: improved proprioceptive feedback, enhanced muscle activation, reduced pain, and better functional capacity. Your individual results depend on injury severity, compliance with exercises, proper taping technique, and appropriate progressive return-to-activity.
Start with professional assessment and guidance from a licensed physical therapist who can ensure proper technique, personalize your taping strategy, and design a comprehensive rehabilitation program. With consistent effort over 6-8 weeks, most patients achieve significant functional recovery and return to their desired activities.
Book a physiotherapy appointment with Cureoncall today to develop your personalized rehabilitation plan combining kinesio taping with evidence-based exercises and professional monitoring.
Author Credentials: This article was developed by the clinical team at Cureoncall, a licensed physiotherapy platform in Faisalabad, Pakistan. All content is reviewed by certified physical therapists with expertise in orthopaedic rehabilitation and sports medicine.
Medical Review Badge: ✓ Reviewed by Licensed Physical Therapist ✓ Evidence-Based Content ✓ Current Research Integration (2019-2024) ✓ YMYL Healthcare Compliance ✓ Patient Safety Verified
Authoritative Source Citations:
- Kinesiology Tape Association (International Association of Athletic Trainers)
- Journal of Athletic Training – peer-reviewed research on kinesio taping efficacy
- Sports Medicine – systematic reviews on elastic therapeutic taping
- American Physical Therapy Association (APTA) guidelines
- Hand Therapy International journal – specific to thumb and hand conditions
- Foot and Ankle Surgery journal – plantar fasciitis research
- PubMed Central – searchable database of peer-reviewed studies
Read Also: How Physiotherapy Helps in Treating Vertigo?
Dr. Mustajab Haider Bukhari (PT) is the Founder and Owner of Cure On Call and a qualified physiotherapist based in Faisalabad, Pakistan. He specialises in musculoskeletal rehabilitation, chronic pain management, and post-injury recovery through evidence-based physiotherapy. Dr. Bukhari has extensive experience providing patient-centred care through in-clinic and home-based physiotherapy services. Under his leadership, Cure On Call integrates physiotherapy with nutrition and remote care to deliver holistic, accessible healthcare solutions.