Introduction
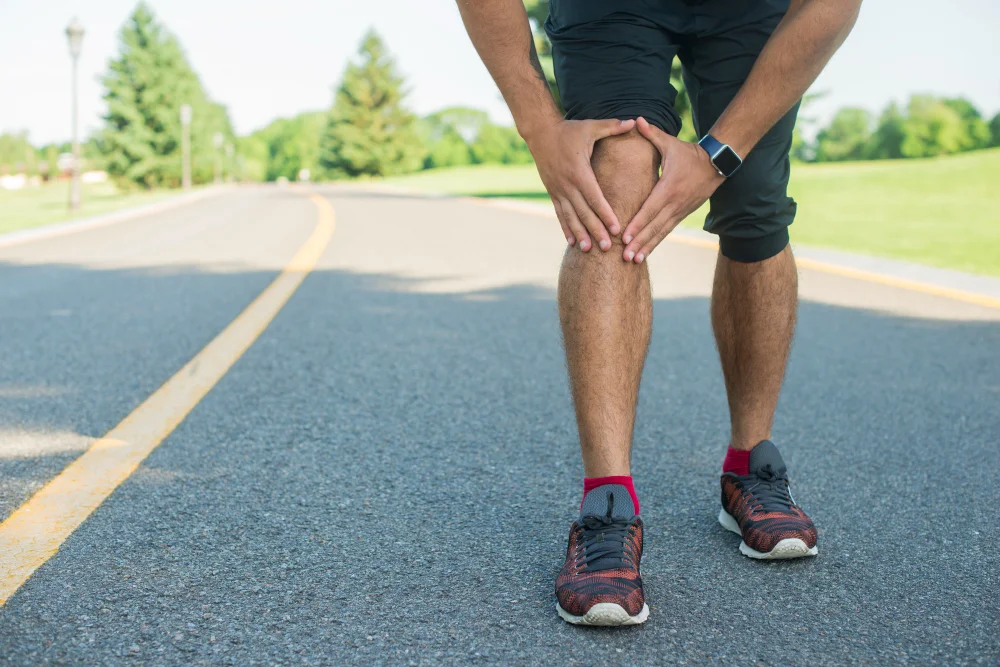
A meniscal tear can feel like your knee has betrayed you. Whether you heard a pop during sports, felt a sudden sharp pain, or noticed swelling that won’t go down, you’re probably wondering: Do I need surgery? Can physical therapy actually help? What does recovery really look like?
The good news: most meniscal tears respond extremely well to structured physical therapy. Research consistently shows that conservative (non-surgical) treatment works for many people—even some with significant tears—when you follow a progressive, evidence-based approach. Physical therapy reduces pain, restores stability, and returns you to activities without surgery.
But here’s what matters: not all meniscal tears are the same, and the right treatment depends on your specific injury. A professional assessment can determine whether home exercises alone will work or whether you need guided rehabilitation to avoid long-term complications.
This guide covers everything you need to know: how meniscal tears happen, what physical therapy can do, which exercises actually work, and the realistic recovery timeline. You’ll also learn the warning signs that indicate when surgery might be necessary—so you can make confident decisions about your knee health.
Quick Overview
What is a meniscal tear? Your meniscus is a crescent-shaped piece of cartilage inside your knee that acts as a shock absorber between your thighbone and shinbone. A meniscal tear is a rupture in this cartilage, typically caused by twisting or sudden directional changes. It can range from a small partial tear to a complete tear that creates loose cartilage fragments.
Who gets them? Meniscal tears affect athletes and non-athletes alike. While sports injuries cause many acute tears (think sudden twists during soccer or basketball), degenerative tears are common in people over 40, developing gradually from normal wear and tear.
Why physical therapy works: The meniscus has limited blood supply, so it can’t heal like other tissues. Physical therapy works by:
- Reducing inflammation around the joint
- Strengthening the muscles that stabilize your knee (quadriceps, hamstrings, glutes)
- Improving proprioception (body awareness and stability)
- Restoring normal movement patterns
- Protecting the tear from further stress while healing occurs
Recovery timeline: For uncomplicated meniscal tears managed conservatively, most people see significant improvement within 6–12 weeks. Full return to demanding activities often takes 3–6 months.
Understanding Meniscal Tears
What Exactly Is Happening?
Your knee contains two menisci (plural of meniscus)—one on the inner side (medial meniscus) and one on the outer side (lateral meniscus). Each is a tough piece of cartilage designed to cushion forces on your knee and help distribute weight evenly during movement.
When the meniscus tears, the cartilage splits. Depending on the tear’s location and orientation, it may cause:
- Joint line pain (felt on the sides of your knee)
- Swelling from inflammatory fluid buildup
- Clicking or locking if the torn piece shifts
- Instability or a feeling that your knee might “give out”
Types of Meniscal Tears
Not all meniscal tears are created equal. Understanding yours helps determine treatment:
Peripheral tears (near the outer edge): These have better blood supply and healing potential. They often respond well to physical therapy alone.
Central or complex tears: Located toward the center of the meniscus where there’s almost no blood supply. Surgery is more commonly needed, though some respond to conservative care.
Degenerative tears: Develop gradually from wear and tear, often in older knees. These are common and usually respond well to strengthening and activity modification.
Bucket-handle tears: A specific tear pattern where a portion flips into the joint, potentially blocking movement. These often require surgical repair.
Traumatic vs. degenerative: Acute traumatic tears (sudden injury during activity) often have better rehabilitation outcomes than chronic degenerative tears, though both can improve with proper care.
Why Meniscal Tears Happen
Acute mechanisms (sudden injuries):
- Pivoting or twisting with a planted foot
- Deep squatting combined with rotation
- Direct impact to the outside of the knee
- Sports that involve rapid direction changes
Degenerative causes:
- Normal aging and cartilage breakdown
- Previous knee injuries that altered mechanics
- Muscle weakness allowing abnormal movement patterns
- Inflammatory conditions like arthritis
Risk factors:
- Previous knee injuries
- Muscle weakness, particularly in the quadriceps
- Poor hip strength and stability
- Tight hamstrings and calf muscles
- Overtraining without adequate recovery
- Activities with repetitive twisting or impact
Symptoms and Signs
Primary Symptoms
Pain: Usually felt on the inner or outer joint line (the crease on either side of your knee). The pain may be sharp and localized or feel more like a deep, aching soreness.
Swelling: Often develops within hours to a day after injury. The knee may feel puffy and look enlarged.
Clicking or popping: A catching sensation or audible click during certain movements, particularly squatting or rotating.
Instability: Your knee may feel wobbly or like it might “give way,” especially with twisting movements.
Reduced range of motion: You might struggle to fully straighten or bend your knee, particularly early after injury.
Secondary Symptoms Often Overlooked
Referred pain: Pain may seem to travel up the thigh or down the shin because of how your leg compensates for the injury.
Stiffness after rest: Your knee may feel particularly stiff when you first get up in the morning or after sitting for extended periods.
Weakness: Not just pain, but actual weakness when straightening your knee fully or pushing off during walking.
Limp: Many people develop an altered gait to avoid pain, which can lead to secondary problems in the hip or opposite knee.
How Symptoms Progress
Acute phase (first few days):
- Sharp pain and significant swelling
- Difficulty with basic movements
- Possible sensation of instability or locking
Subacute phase (weeks 1–4):
- Swelling gradually reduces (if managed properly)
- Pain decreases with activity modification
- Movement becomes easier, though some activities remain painful
Recovery phase (weeks 4–12+):
- Continued gradual reduction in pain and swelling
- Increasing confidence in knee stability
- Return to more demanding activities as strength improves
Red Flags Requiring Professional Assessment
Seek immediate professional evaluation if you experience:
- Sudden severe swelling (beyond normal inflammation)
- Inability to straighten your knee fully (possible locked meniscus)
- Severe pain that doesn’t improve with rest and ice
- Instability that persists despite activity modification
- Mechanical symptoms (clicking/locking) that worsen or change
- Signs of infection (warmth, redness, fever—though rare)
Root Causes and Risk Factors
Biomechanical Causes (The Mechanics of Injury)
Knee valgus during activity: Your knee caving inward during squats or landings. This abnormal position stresses the medial meniscus and can cause tearing.
Hip weakness: When your hip abductor muscles (gluteus medius) are weak, your knee drifts inward during dynamic activities. This is one of the most common biomechanical culprits in meniscal injuries.
Poor ankle mobility: Tight ankles force your knee to compensate during lunges, squats, and lateral movements, creating tearing forces on the meniscus.
Quadriceps strength imbalance: Weak quadriceps (thigh muscles) can’t stabilize your knee properly, allowing excessive wobbling and abnormal cartilage loading.
Hip external rotator weakness: Your deep hip rotator muscles stabilize rotational forces. Weakness increases twisting stress on the meniscus.
Lifestyle and Activity Factors
Sudden activity increases: Jumping from sedentary to high-impact activity without gradual conditioning is a common cause of degenerative tears.
Repetitive pivoting or twisting: Activities like tennis, basketball, or dance with frequent cutting movements strain the meniscus.
Sitting positions: Prolonged deep squatting or kneeling can aggravate existing weaknesses and contribute to degenerative tearing.
Poor movement patterns: How you squat, lunge, and climb stairs matters enormously. Bad mechanics multiply the stress on your meniscus.
Non-Modifiable Risk Factors
Age: Meniscal tissue becomes more fragile after 40, making degenerative tears more common even without significant trauma.
Previous knee injuries: Ligament sprains, patellar problems, or prior meniscal tears increase risk of future tears.
Osteoarthritis: Cartilage damage from arthritis makes remaining meniscal tissue more prone to tearing.
Genetic predisposition: Some people naturally have weaker cartilage or connective tissue.
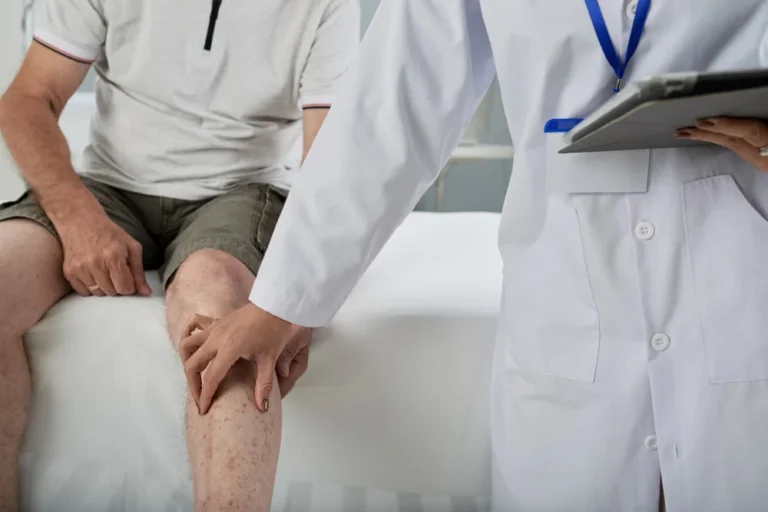
Professional Diagnosis and Assessment
How Physiotherapists Evaluate a Meniscal Tear
When you see a physiotherapist or physician, the assessment includes:
Clinical history: Your therapist will ask detailed questions about how the injury occurred, what makes it better or worse, and how it’s affecting your daily activities.
Physical examination:
- McMurray’s test: A specific movement where the knee is bent and twisted to reproduce the clicking or pain characteristic of meniscal tears. Positive results suggest meniscal involvement.
- Thessaly test: A weight-bearing rotation test that can reproduce meniscal symptoms.
- Joint line tenderness: Pain along the knee’s joint line on palpation.
- Lachman test and anterior drawer: Tests for ligament injuries, which often occur alongside meniscal tears.
- Range of motion assessment: Checking for restrictions in bending and straightening.
- Strength testing: Evaluating quad, hamstring, and hip strength.
- Proprioception testing: Balance and stability assessment.
Imaging (if recommended):
- MRI: The gold standard for confirming meniscal tears. Provides detailed images of the tear’s size, location, and type. Often ordered if diagnosis is unclear or if surgery might be considered.
- X-rays: Usually taken to rule out fractures and assess for arthritis, though they don’t show soft tissue like the meniscus.
- Ultrasound: Sometimes used as an initial assessment tool; less detailed than MRI but faster and cheaper.
What Your Assessment Determines
Beyond confirming the tear’s presence, assessment identifies:
- Tear characteristics: Size, location, and pattern—critical for prognosis
- Associated injuries: Ligament sprains, cartilage damage, or other problems
- Your current strength and mobility: Baseline metrics for tracking progress
- Movement pattern problems: Specific biomechanical issues to address
- Your goals and activity demands: Helps personalize your rehabilitation plan
- Readiness for conservative treatment: Some tears require surgery; most don’t
Why Professional Assessment Matters
While many meniscal tears can be managed at home with exercise, professional assessment:
- Confirms the diagnosis accurately (home assessment is just guessing)
- Rules out surgical necessity (some tears need surgery)
- Identifies biomechanical causes that must be corrected to prevent recurrence
- Provides expert progression guidance (knowing when and how to advance exercises)
- Catches complications early (loose fragments, persistent swelling, instability)
- Accelerates recovery (structured guidance beats trial-and-error)
A CureOnCall physiotherapist can comprehensively assess your knee, confirm the meniscal tear’s characteristics, and design a personalized rehabilitation plan that maximizes your recovery potential while safely managing your specific injury.
Evidence-Based Treatment and Management Options
Physical Therapy: The Primary Treatment
How it works: Physical therapy addresses the root causes of meniscal injury by improving strength, stability, proprioception, and movement patterns. This allows the meniscus to heal in a protected environment where abnormal forces are eliminated.
Effectiveness: Research shows that 50–70% of people with meniscal tears improve significantly or resolve completely with conservative physical therapy treatment. Healing typically takes 6–12 weeks for significant improvement, with ongoing gains for several months.
Best for: Peripheral tears, degenerative tears, partial tears, and people who want to avoid surgery. Even some complex central tears respond to conservative care, though success rates are lower.
What to expect: A structured program starting with pain management and gentle mobility, progressing to strengthening, balance, and sport-specific training. Sessions typically involve professional guidance combined with home exercise.
Activity Modification and Rest
What it means: Temporarily avoiding movements and activities that stress the meniscus while it heals.
Specific modifications:
- Avoid deep squatting and prolonged kneeling in the acute phase
- Limit walking to comfortable distances initially
- Avoid twisting, pivoting, and lateral movements
- Reduce or pause high-impact activities (running, jumping)
- Modify stairs, getting in and out of cars, and other daily movements
Timeline: Most people can gradually increase activity after 2–4 weeks as pain improves. Full return to demanding activities takes 3–6 months.
Effectiveness: Essential foundation, but not sufficient alone. Activity modification protects the healing meniscus; physical therapy fixes the underlying biomechanical problems.
Inflammation Management
Immediate phase (first 72 hours):
- Ice: 15–20 minutes, several times daily reduces swelling and pain
- Compression: Knee sleeve or wrap reduces fluid buildup
- Elevation: Leg above heart level when resting
- NSAIDs: Anti-inflammatory medications (ibuprofen, naproxen) can reduce pain and swelling, though avoid prolonged use
Ongoing management:
- Continue ice after activity that provokes pain
- Heat (contrast therapy of ice then heat) may help after acute phase
- Compression during activity provides support and stability
Effectiveness: Inflammation management alone doesn’t heal the tear, but it’s essential to create an environment where healing and rehabilitation can proceed.
Manual Therapy
What it includes:
- Soft tissue mobilization to reduce muscle tightness
- Joint mobilization to restore knee movement
- Trigger point release to address referred pain from compensation
- Myofascial release of the fascia surrounding muscles
How it helps: Reduces pain, improves movement quality, and prepares tissues for strengthening work.
Evidence: Supportive when combined with exercise; not effective alone.
Surgical Intervention
When it’s considered:
- Bucket-handle tears that block knee movement
- Large central tears that haven’t improved after 6–12 weeks of physical therapy
- Loose cartilage fragments causing instability or mechanical symptoms
- Tears combined with significant ligament injuries
- Failure to improve after adequate conservative treatment
Types:
- Arthroscopic repair: Reattaches peripheral tears with good healing potential
- Arthroscopic meniscectomy: Removes the torn portion (historically common, now more conservative)
- Meniscal replacement: Newer technique for large tears in younger patients
Recovery after surgery: 2–6 months of post-surgical rehabilitation, with 6–12 months to full return to activities.
Important context: Surgery doesn’t prevent the need for rehabilitation. Post-surgical physical therapy is equally critical and follows similar principles to conservative management.
When to Consider Each Option
Start with conservative physical therapy if:
- Your tear is peripheral or degenerative
- You’re experiencing pain but can manage daily activities
- You haven’t tried structured physical therapy yet
- You want to avoid surgery if possible
Consider surgery if:
- Your knee locks or catches severely, affecting function
- You’ve completed 8–12 weeks of physical therapy without adequate improvement
- Conservative management isn’t compatible with your life demands
- An imaging specialist identifies a tear pattern requiring surgical repair
Practical Exercise Guide for Meniscal Tear Recovery
Recovery progresses through phases. Start where you are (based on pain and swelling levels) and progress as your knee tolerates. Do these exercises 5–6 days per week. Pain during exercise should stay at 3/10 or less.
Important Safety Notes
- No sharp pain: Mild discomfort is acceptable; sharp pain means you’re doing too much
- Swelling monitor: If swelling increases after exercise, you progressed too quickly
- Movement quality > quantity: Proper form matters far more than speed or reps
- Warm up first: 5 minutes of walking or stationary cycling before starting exercises
- Ice after: 15 minutes after exercise to manage inflammation
PHASE 1: Protection and Early Mobility (Weeks 1–3)
Goals: Reduce pain and swelling, restore basic knee movement, activate muscles without stress
Exercise 1: Quad Sets (Isometric Quadriceps Activation)
How to do it:
- Sit with your leg straight in front of you, placing a small towel roll under your knee
- Tighten the muscle on top of your thigh (quadriceps) as hard as you can without pain
- Hold this contraction for 5 seconds
- Release and rest for 2 seconds
- Repeat for 2 sets of 15 reps
Why it works: Activates the quadriceps without moving your knee, essential for later strength work
Common mistakes: Holding the contraction weakly; forgetting to relax fully between reps
Modifications: If this is painful, reduce the contraction intensity—activate the muscle just barely
Exercise 2: Straight Leg Raise (Front Thigh)
How to do it:
- Lie on your back with one leg bent, foot flat on floor
- Straighten your other leg completely
- Tighten your thigh muscle and lift your straight leg about 12 inches off the ground
- Hold for 2 seconds
- Lower slowly without touching the floor
- Repeat for 2 sets of 10 reps per leg
Why it works: Strengthens the quadriceps without bending the knee (which stresses the meniscus)
Common mistakes: Not fully straightening the leg; bending the knee during the lift
Modifications: Perform this lying on your back only if side-lying feels more comfortable on your injury side
Exercise 3: Gentle Knee Flexion and Extension (Pendulum Swings)
How to do it:
- Stand and hold onto something stable for balance
- Gently swing your injured leg forward and backward in a slow, controlled manner
- Let gravity do the work—don’t force the movement
- Perform for 1–2 minutes, multiple times daily
- Gradually increase the range of motion as comfort improves
Why it works: Maintains mobility without muscle contraction, reduces stiffness
Common mistakes: Swinging too aggressively; forcing range of motion
Modifications: If standing is difficult, sit in a chair and perform the same movement
Exercise 4: Glute Activation Bridges
How to do it:
- Lie on your back with both knees bent, feet flat on floor, hip-width apart
- Tighten your buttock muscles and lift your hips off the ground
- Hold the bridge position for 3 seconds
- Lower back down
- Repeat for 2 sets of 10 reps
Why it works: Activates the gluteus muscles, which stabilize the hip and knee
Common mistakes: Pushing primarily with your legs rather than squeezing glutes; not lifting fully
Modifications: If this is painful, reduce the lift height; just activate the glutes without full hip extension
Read Also: How to Do Chest Physiotherapy for Adults
PHASE 2: Progressive Strengthening (Weeks 4–8)
Goals: Build quadriceps, hamstring, and glute strength; improve hip stability; restore weight-bearing confidence
Continue Phase 1 exercises as warmups, then add:
Exercise 5: Step-Ups (Controlled Strength)
How to do it:
- Stand in front of a 4–6 inch step or low platform
- Step up with your affected leg, driving through the heel
- Stand up fully on the step
- Step down with your unaffected leg first, controlling the descent
- Repeat for 2 sets of 10 reps per leg
Why it works: Strengthens quadriceps and glutes in a weight-bearing position that mimics daily activities
Common mistakes: Pushing off the step rather than driving through the heel; descending too quickly
Modifications: Use a lower step or hold a rail for balance; start with smaller steps
Exercise 6: Mini Lunges (Partial Depth)
How to do it:
- Stand with feet hip-width apart
- Take a small step forward with one leg (about 12 inches)
- Gently bend both knees to approximately 45 degrees (not a full lunge)
- Push back to starting position
- Repeat for 2 sets of 10 reps per leg
Why it works: Strengthens quadriceps and glutes; improves balance and stability
Common mistakes: Stepping too far forward; bending knees too deeply; letting front knee drift inward
Modifications: Reduce depth further; hold onto a rail for balance
Exercise 7: Clamshells (Hip External Rotation)
How to do it:
- Lie on your side with knees bent to 45 degrees, heels together
- Keeping your heels touching, lift your top knee up toward the ceiling
- Feel the contraction on the outside of your hip and buttock
- Lower your knee back down
- Repeat for 2 sets of 15 reps per side
Why it works: Strengthens the hip external rotators, which stabilize your knee during movement
Common mistakes: Rolling backward; not isolating the hip movement; lifting too high
Modifications: If lying on your side is uncomfortable, perform this exercise standing
Exercise 8: Wall Sits (Isometric Leg Strength)
How to do it:
- Stand with your back against a wall, feet about hip-width apart, 18 inches from the wall
- Slowly slide down the wall, bending your knees to about 60–70 degrees (partial squat)
- Hold this position, keeping your weight in your heels
- Hold for 20–30 seconds
- Slide back up to standing
- Repeat for 2 sets of 5–8 holds
Why it works: Builds quadriceps strength and endurance without dynamic movement that stresses the meniscus
Common mistakes: Letting knees drift inward; sliding too low; holding with toes (not heels)
Modifications: Use a higher wall-sit angle (more upright) initially; reduce hold time
Exercise 9: Hamstring Curls (Seated or Lying)
How to do it:
- Sit in a chair with feet on the floor
- Bend one knee, bringing your heel toward your buttock
- Hold for 1 second and straighten slowly
- Repeat for 2 sets of 12 reps per leg
Alternative (lying): Lie on your stomach and perform the same movement
Why it works: Strengthens the hamstring, which stabilizes the back of the knee
Common mistakes: Lifting your thigh off the chair; jerky movements
Modifications: Perform in standing with a chair for balance if sitting is painful
PHASE 3: Dynamic Balance and Sport-Specific Training (Weeks 9–12+)
Goals: Restore single-leg stability, improve proprioception, prepare for return to activities
Continue previous exercises, then add:
Exercise 10: Single-Leg Stance
How to do it:
- Stand near a wall or rail for safety
- Lift one leg off the ground, bending the knee to 45 degrees
- Balance on the standing leg for 30 seconds
- Lower your leg and rest
- Repeat for 2 sets of 30–45 seconds per leg
Why it works: Develops single-leg stability, proprioception, and neuromuscular control essential for sports and uneven surfaces
Common mistakes: Not engaging your core; letting your hip drop on the lifted side
Modifications: Remain near support for safety; reduce duration as needed; perform with eyes open initially
Exercise 11: Single-Leg Mini Squats
How to do it:
- Stand facing a wall or holding onto a rail
- Lift one leg slightly off the ground
- Bend the standing leg’s knee just 20–30 degrees (very small squat depth)
- Push back to standing
- Repeat for 2 sets of 10 reps per leg
Why it works: Combines single-leg balance with strengthening; sport-specific stability
Common mistakes: Bending too deeply; letting hip drop; not controlling descent
Modifications: Perform shallow squats; reduce range of motion; hold support firmly
Exercise 12: Lateral Step-Downs
How to do it:
- Stand on a 4–6 inch step facing forward
- Step off the step by placing one foot on the ground out to the side
- Tap the ground lightly (don’t put full weight down initially)
- Push back up to standing on the step
- Repeat for 2 sets of 10 reps per side
Why it works: Strengthens hip and knee stability; trains the deceleration control needed for sports
Common mistakes: Stepping too far down; not controlling descent; letting knee drift inward
Modifications: Reduce step height; hold onto something for balance
Exercise 13: Backward Walking
How to do it:
- Stand near a wall or in a hallway where you can hold support if needed
- Walk backward slowly for 30–60 seconds
- Maintain an upright posture
- Rest and repeat for 2–3 sets
Why it works: Develops hip and knee stability in a different movement pattern; improves proprioception
Common mistakes: Walking too fast; hunching forward; not looking where you’re going
Modifications: Perform near a wall; reduce duration; slow the pace
Exercise 14: Step-Ups with Rotation (Dynamic Control)
How to do it:
- Stand in front of a 4–6 inch step
- Step up with one leg
- As you stand on the step, gently rotate your trunk toward the leg that’s up
- Step back down
- Repeat for 2 sets of 8 reps per side
Why it works: Combines strengthening with rotational control, simulating sport-like movements
Common mistakes: Rotating too aggressively; bending at the spine rather than rotating at the trunk
Modifications: Reduce rotation; reduce step height; go slower
Progression Guidelines
When to progress to the next exercise:
- Current exercise feels comfortable at 3 sets
- No increased swelling after exercise
- Pain is minimal (1–2/10)
- You can maintain perfect form throughout
Progression examples:
- Increase reps by 5 before increasing difficulty
- Decrease rest time between sets
- Increase duration of holds
- Reduce external support (rail, wall, hand-holds)
- Add resistance (light ankle weights after week 8)
Read Also: Nerve Pain and Sciatica Physiotherapy
Lifestyle Integration and Long-Term Prevention
Daily Activity Modifications
During the recovery period (first 6–12 weeks):
Stairs and slopes:
- Go down stairs slowly, one step at a time
- Use a rail for stability
- Avoid long flights when possible
- Avoid steep hills during early recovery
Getting in and out of cars:
- Sit first, then swivel your legs into the car
- Use your arms to lower yourself slowly
- Avoid twisting while loading weight on your knee
Sitting and standing:
- Get up slowly from chairs or couches
- Use arm support to reduce strain on your knee
- Avoid sitting with your knee fully bent for extended periods
- Change positions every 30 minutes
Work environment:
- Alternate between sitting and standing
- Take walking breaks every hour
- Adjust your desk to avoid sustained poor posture
- Avoid sitting cross-legged
Sleep and recovery:
- Sleep on your back or unaffected side
- Place a pillow under your knee when lying down to maintain gentle flexion
- Aim for 7–9 hours of sleep nightly (sleep aids healing)
- Elevate your leg on a pillow during the day
Return to Activity Progression
Week 1–2: Gentle walking (as tolerated), basic physical therapy
Week 3–4: Increased walking, stationary cycling (if pain-free at 0–30 minutes)
Week 5–6: Swimming or water walking (if available)
Week 7–8: Light jogging intervals (on soft surfaces like grass or track), increased cycling duration
Week 9–12: Sport-specific training, sport-specific drills, gradual return to competition
Key principle: Each return phase should feel comfortable before advancing. Pain of more than 2–3/10 during activity indicates you’re progressing too quickly.
Long-Term Prevention Strategies
Maintain strength indefinitely:
- Continue quadriceps, hamstring, and glute strengthening 2–3 times per week
- This prevents recurrence and supports long-term knee health
- Even after you’ve returned to sports, maintenance matters
Hip and ankle mobility:
- Daily stretching for tight hip flexors and hamstrings
- Ankle mobility work to ensure proper lower-limb alignment
- 10 minutes daily prevents tightness that contributes to recurrence
Movement quality:
- Maintain awareness of knee position during squats and lunges (don’t let it drift inward)
- Practice good landing mechanics if doing impact activities
- Avoid sudden increases in activity volume
Activity pacing:
- Follow the “10% rule”: Don’t increase your training volume by more than 10% per week
- Include adequate recovery days (rest days are when your body actually adapts)
- Listen to pain signals—they’re warning you to modify
Footwear:
- Wear supportive shoes during activities
- Replace athletic shoes every 300–500 miles
- Consider custom orthotics if you have significant foot mechanics issues
When to Seek Professional Help
Signs You Should Get Professional Assessment
Initially:
- Significant knee swelling that doesn’t improve in 48 hours with ice and elevation
- Inability to bear weight on your leg
- Severe pain unrelieved by rest and over-the-counter medication
- Mechanical symptoms (catching, locking, giving way)
- Uncertainty about the injury’s severity
During recovery:
- Pain isn’t improving after 3–4 weeks of activity modification
- Swelling increases or returns after initially improving
- You’re uncertain whether you’re progressing correctly
- You experience new or different symptoms
- You want to optimize recovery for return to sports
Red flags requiring urgent evaluation:
- Sudden, severe swelling suggesting bleeding into the joint
- Inability to fully straighten your knee (possible locked meniscus)
- Feeling of instability that worsens despite home exercises
- Signs of infection (warmth, redness, fever—rare but serious)
What a Physiotherapist Can Provide
Comprehensive assessment:
- Detailed movement analysis identifying your specific biomechanical problems
- Clear understanding of your tear characteristics and prognosis
- Objective measures of progress (strength testing, range of motion)
Personalized exercise progression:
- Exercises tailored to your specific injury and limitations
- Expert guidance on when and how to progress
- Modifications based on your response to treatment
Manual therapy:
- Soft tissue release to address muscle tightness
- Joint mobilization to restore normal movement
- Trigger point release for referred pain
Facility-based training:
- Access to specialized equipment (resistance machines, balance equipment)
- Real-time form correction from a professional
- Group classes with people at similar recovery stages
- Motivation and accountability
Return-to-sport optimization:
- Sport-specific training tailored to your activity
- Injury prevention strategies for your specific sport
- Confidence building for return to competition
CureOnCall physiotherapists provide comprehensive meniscal tear assessment and rehabilitation, combining evidence-based exercise prescription with personalized guidance to maximize your recovery and prevent recurrence. Whether you’re starting your rehabilitation journey or want to optimize your return to activities, professional guidance accelerates results.
Read Also: Back Pain Physiotherapy
Common Misconceptions and Myths
Myth 1: “Any meniscal tear requires surgery”
The truth: Most meniscal tears respond well to conservative physical therapy. Research shows 50–70% of tears heal with exercise and strengthening. Only specific tear patterns (bucket-handle tears, large central tears blocking movement) or tears that don’t improve after 8–12 weeks typically require surgery.
Myth 2: “You need surgery if you still have pain after a few weeks”
The truth: Meniscal tears take 6–12 weeks to show significant improvement. Some improvement may be visible in 2–3 weeks, but full recovery typically requires 3–6 months. Patience combined with consistent physical therapy is essential.
Myth 3: “Rest alone will heal your meniscus”
The truth: While rest protects the tear, it doesn’t fix the underlying biomechanical problems that caused it. Without strengthening and movement correction, you’ll likely re-injure the same structure or develop chronic weakness. Rest + physical therapy > rest alone.
Myth 4: “Once you tear your meniscus, you’ll always have knee problems”
The truth: With proper rehabilitation addressing strength and movement patterns, many people return to full activity with no ongoing problems. Your meniscus can function well even after a tear, especially if underlying causes are corrected.
Myth 5: “You can’t exercise with a meniscal tear—you’ll make it worse”
The truth: Proper exercise actually accelerates healing and reduces pain. The key is appropriate progression and avoiding movements that specifically stress the torn meniscus (deep squats early on). Progressive strengthening is central to recovery.
Myth 6: “Ice makes healing better, so use it constantly”
The truth: Ice is appropriate for acute inflammation management (first few days to weeks), but excessive icing can interfere with healing. After the acute phase, contrast therapy (alternating ice and heat) is more beneficial.
Myth 7: “You can tell if it’s a serious tear just from how much it hurts”
The truth: Pain level doesn’t correlate well with tear severity. A small peripheral tear can cause significant pain; a large central tear might feel relatively mild. Professional imaging is the only way to know a tear’s characteristics.
Myth 8: “You need an MRI immediately after injury”
The truth: MRI is valuable for confirming diagnosis and assessing tear characteristics, but it’s not always necessary immediately. Many physiotherapists can diagnose meniscal tears based on clinical examination and symptoms. MRI becomes more important if diagnosis is unclear or surgery is being considered.
Recovery Timeline and Realistic Expectations
What Progress Actually Looks Like
Weeks 1–2 (Acute Phase):
- Swelling typically peaks in the first 24–48 hours
- Pain is usually most intense during this period
- Basic movement remains limited
- Focus: pain management, swelling reduction, gentle mobility
- Expected improvement: Minimal mechanical improvement; mostly symptom management
Weeks 3–4 (Early Protection Phase):
- Swelling begins to reduce with proper management
- Pain decreases noticeably
- More activities become tolerable
- You may feel more confident with basic movements
- Focus: continuing activity modification, beginning gentle strengthening
- Expected improvement: 20–30% reduction in baseline pain and swelling
Weeks 5–8 (Progressive Strengthening Phase):
- Significant reduction in swelling
- Pain during basic activities should be minimal
- You can walk farther with less discomfort
- Single-leg activities become possible
- Focus: progressive resistance training, proprioceptive training
- Expected improvement: 50–70% reduction in baseline symptoms; clear functional progress
Weeks 9–12 (Advanced Strengthening Phase):
- Most swelling should be resolved
- Pain with normal activities minimal or absent
- Ability to do demanding tasks (stairs, longer walks, light jogging)
- Return to many recreational activities possible
- Focus: sport-specific training, neuromuscular control, confidence building
- Expected improvement: 80–90% of baseline function recovered; ready for graduated return to activities
Weeks 13–24 (Return to Sport Phase):
- Full functional recovery possible
- Sport-specific movements feel natural
- Confidence in knee stability high
- Return to competitive activities (for athletes)
- Focus: maintaining strength, preventing re-injury, optimizing performance
- Expected improvement: Full or near-full functional restoration
Factors Affecting Your Recovery Timeline
Factors that speed recovery:
- Peripheral (outer) location of tear (better blood supply)
- Younger age (tissues heal faster)
- Consistent exercise adherence (huge factor)
- Early professional intervention
- Degenerative vs. traumatic tear (degenerative often improves faster)
Factors that slow recovery:
- Central (inner) location of tear (limited blood supply)
- Older age
- Poor exercise compliance
- Delayed professional assessment
- Larger tears
- Associated ligament injuries
- Inflammatory conditions like arthritis
When You’re Not Progressing as Expected
If after 8–12 weeks of consistent physical therapy you’re not seeing significant improvement, this may indicate:
- Need for imaging: An MRI might reveal tear characteristics suggesting surgery would help
- Underlying movement problems: A movement specialist can identify patterns you’re not correcting
- Non-compliance: Honestly assessing whether you’re doing the exercises consistently and correctly
- Psychological barriers: Fear-avoidance sometimes limits progression (professional help can address this)
- Systemic issues: Inflammatory conditions or other injuries slowing healing (medical evaluation needed)
Read Also: Knee and Hip Pain Physiotherapy
Frequently Asked Questions
Q: Do I need an MRI to diagnose a meniscal tear?
A: Not always. A skilled physiotherapist or physician can diagnose meniscal tears through clinical examination with good accuracy. MRI becomes important if diagnosis is unclear, if surgery is being considered, or if you’re not improving as expected.
Q: Can meniscal tears heal on their own without physical therapy?
A: Some peripheral tears in younger people may heal with just rest and activity modification. However, most benefit significantly from structured physical therapy. Even if swelling reduces, underlying strength and movement problems often persist without therapy, leading to re-injury or chronic instability.
Q: How long until I can run again after a meniscal tear?
A: This varies based on tear characteristics and your recovery progress. Most people can begin light jogging on soft surfaces around weeks 8–10 if they’ve progressed well through earlier phases. Competitive running typically requires 12–16 weeks or more. Your physiotherapist can guide your specific timeline.
Q: Is it safe to exercise with a meniscal tear?
A: Yes, progressive exercise is essential for recovery. The key is appropriate exercise selection and progression. Avoid deep squats and aggressive twisting early on, but gentle movement and progressive strengthening are critical.
Q: Will I need surgery if I still have pain at 3 months?
A: Not necessarily. Three months is often still within the typical recovery timeline for significant improvement. However, if pain remains severe despite consistent physical therapy, professional reassessment is warranted to determine if imaging or surgery might help.
Q: Can I play sports after a meniscal tear?
A: Most people return to sports successfully. The timeline depends on tear severity and your sport (running-based sports typically require longer recovery than sports with more varied movements). Professional guidance on sport-specific training maximizes your chance of safe return.
Q: What’s the difference between physical therapy and just doing home exercises?
A: While home exercises are essential, professional guidance provides assessment, progression expertise, manual therapy, motivation, and real-time form correction. Studies show professionally supervised rehabilitation typically results in faster recovery and better long-term outcomes.
Q: Can a meniscal tear come back after it heals?
A: Meniscal tissue itself doesn’t typically re-tear in the same place if it healed well. However, if the biomechanical problems that caused the original tear aren’t corrected (hip weakness, poor movement patterns), you can develop new tears in the same or opposite knee. Prevention focuses on maintaining the strength and movement quality you’ve developed.
Q: Is physical therapy expensive, or are there affordable options?
A: Costs vary based on location and provider. Many insurance plans cover physical therapy. Some physiotherapists offer affordable packages or graduated-fee options. CureOnCall provides affordable professional physiotherapy services—discuss options with our team about what fits your situation.
Q: Should I wear a knee brace after a meniscal tear?
A: Knee sleeves or compression wraps can provide support and proprioceptive feedback, particularly when returning to activities. However, bracing shouldn’t replace physical therapy and strength development. Use braces as a supportive tool, not a substitute for exercise and movement correction.
Conclusion and Next Steps
A meniscal tear is a manageable injury. While the initial pain and swelling can be frightening, the reality is that most meniscal tears respond well to systematic physical therapy. Your knee can heal, your strength can return, and you can reclaim the activities you enjoy—often without surgery.
The path forward requires three commitments:
1. Consistent exercise: The exercises in this guide work only if you actually do them regularly. Five to six days per week of dedicated rehabilitation beats sporadic effort.
2. Progressive challenge: Healing requires gradually increasing demands on your knee. Your physiotherapist or this guide shows you when and how to progress—and progression is non-negotiable for full recovery.
3. Professional guidance: While home exercises are essential, professional assessment and personalized guidance accelerate results and prevent re-injury.
Your meniscal tear doesn’t define your knee’s future. With evidence-based physical therapy, attention to movement quality, and consistent effort, you’ll likely return to full function with a stronger, more resilient knee than before.
If you’re ready to begin or optimize your meniscal tear recovery, CureOnCall’s physiotherapists provide comprehensive assessment, personalized rehabilitation planning, and expert guidance to maximize your recovery. Schedule a consultation today to start your journey back to full knee function and the activities you love.
This article is educational content about meniscal tear management. It is not medical advice. Always consult with a healthcare provider before beginning a new exercise program, especially if you have significant pain or swelling. Your physiotherapist or physician can provide personalized guidance based on your specific injury.
Read Also: What Are the Physiotherapy Exercises for Knee Pain?
Dr. Mustajab Haider Bukhari (PT) is the Founder and Owner of Cure On Call and a qualified physiotherapist based in Faisalabad, Pakistan. He specialises in musculoskeletal rehabilitation, chronic pain management, and post-injury recovery through evidence-based physiotherapy. Dr. Bukhari has extensive experience providing patient-centred care through in-clinic and home-based physiotherapy services. Under his leadership, Cure On Call integrates physiotherapy with nutrition and remote care to deliver holistic, accessible healthcare solutions.